WLED Project: Smart Home Carport Illumination
Installation of individually controllable LED stripes for extraordinary lighting effects in our Smart House.
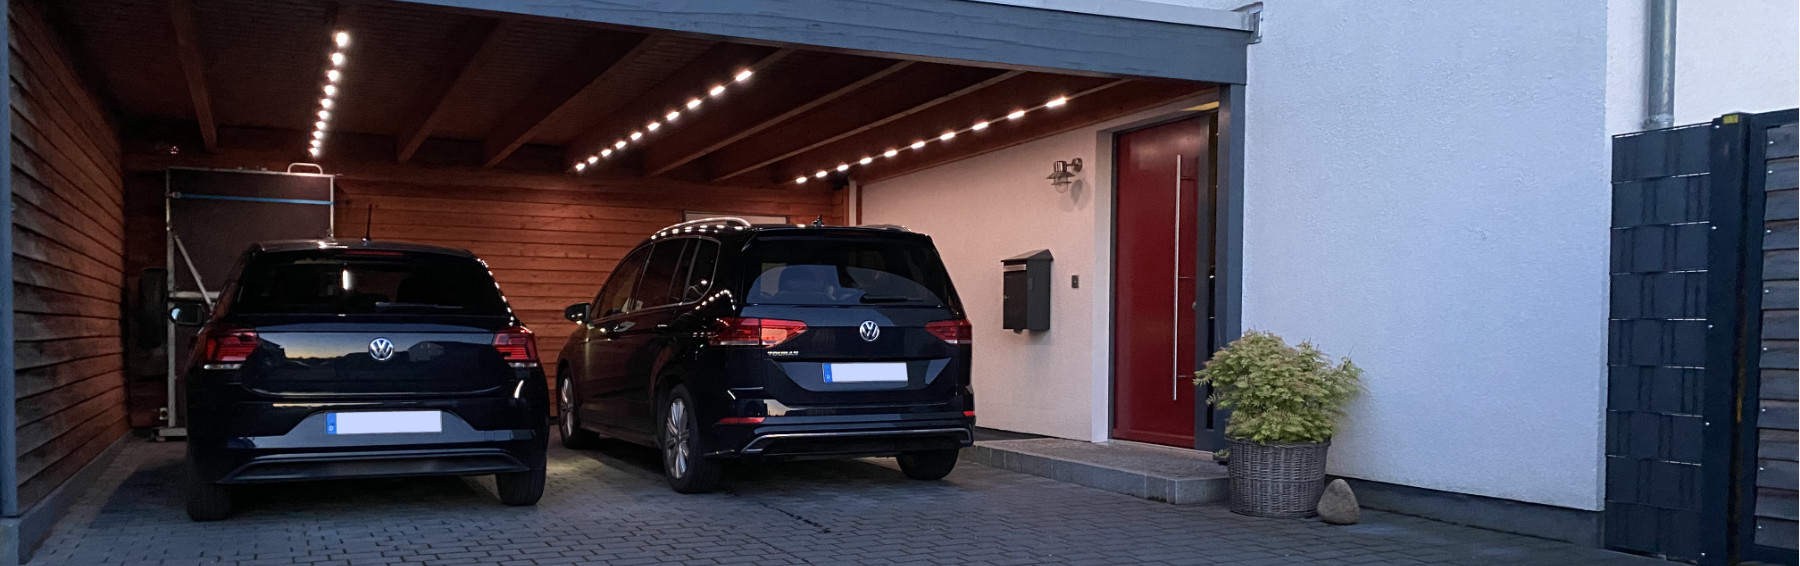
For a long time, I have been looking for a way to illuminate our carport. Our entrance light next to the front door is on the one hand too weak to illuminate the entire carport. On the other hand, I wanted to install a more flexible illumination in terms of brightness, colors and effects.
The YouTube video from DaOptika was just the right inspiration. It demonstrates the illumination of a garage door with individually controllable LED stripes. This offers almost endless possibilities in terms of illumination scenes in combination with a smart house.
Features
For our carport illumination I wanted to have the possibility to visualize the following scenarios by different lighting scenes:
- Cozy lighting (starting at dusk)
- Motion detected (when motion is detected or front door is opened)
- Maximum light (e.g. when working under the carport)
- Signal when leaving the house (all windows closed or one window still open)
- Alarm signal (in case of a break-in or panic button)
- Fun illumination (party, Halloween, Christmas)
The different light scenes should of course be triggered by our Smart Home Center, the Loxone Miniserver.
Realization
I adopted the idea of DaOptika´s garage illumination but adapted it slightly for our situation. The basic idea is to install LED strips where each LED can be controlled individually in terms of color and brightness. In conjunction with a suitable controller and the appropriate SW (in my case WLED), it is super easy to create countless effects and light scenes.
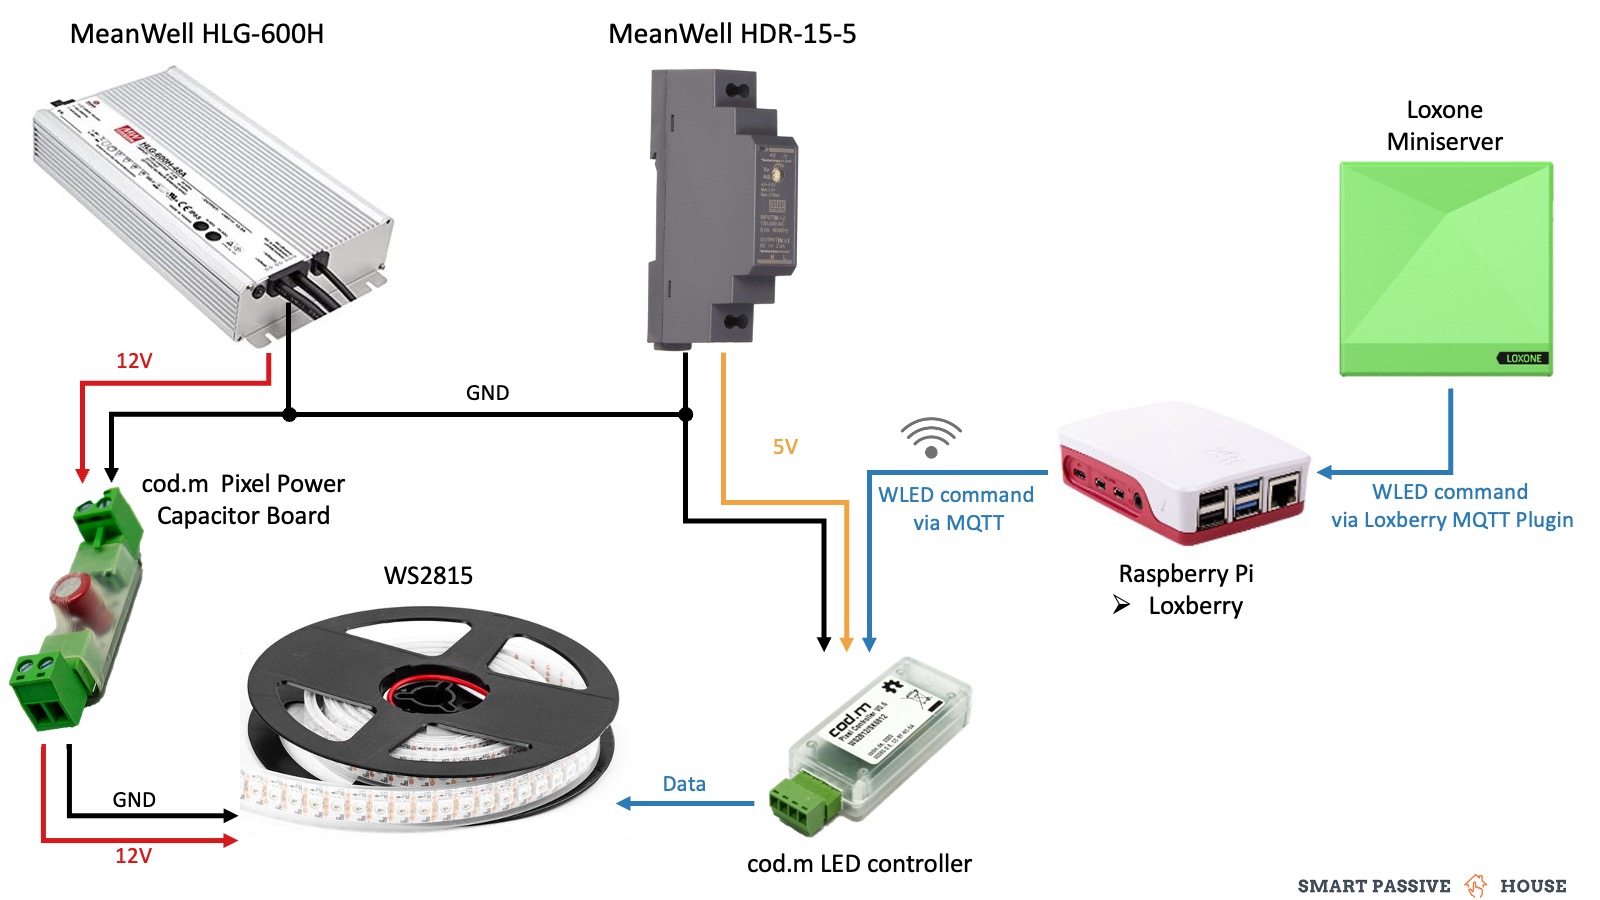
Wiring Diagram WLED Controller & WS2815 Stripe
Components
I installed the following components:
1. LED Stripe
Picking the right LED stripe is not easy and depends heavily on your use case. I followed the YouTube video of The Hook Up and went for a WS2815 LED Stripe with 60 LEDs/m. The decisive factor for me was that the stripe can be installed in a length of 5m and thereby only one side must be supplied with voltage without loss of brightness. This was very important for my installation situation. I ordered the stripe directly from the manufacturer BTF-Lighting. Faster but also a little more expensive is the shipping via Amazon.
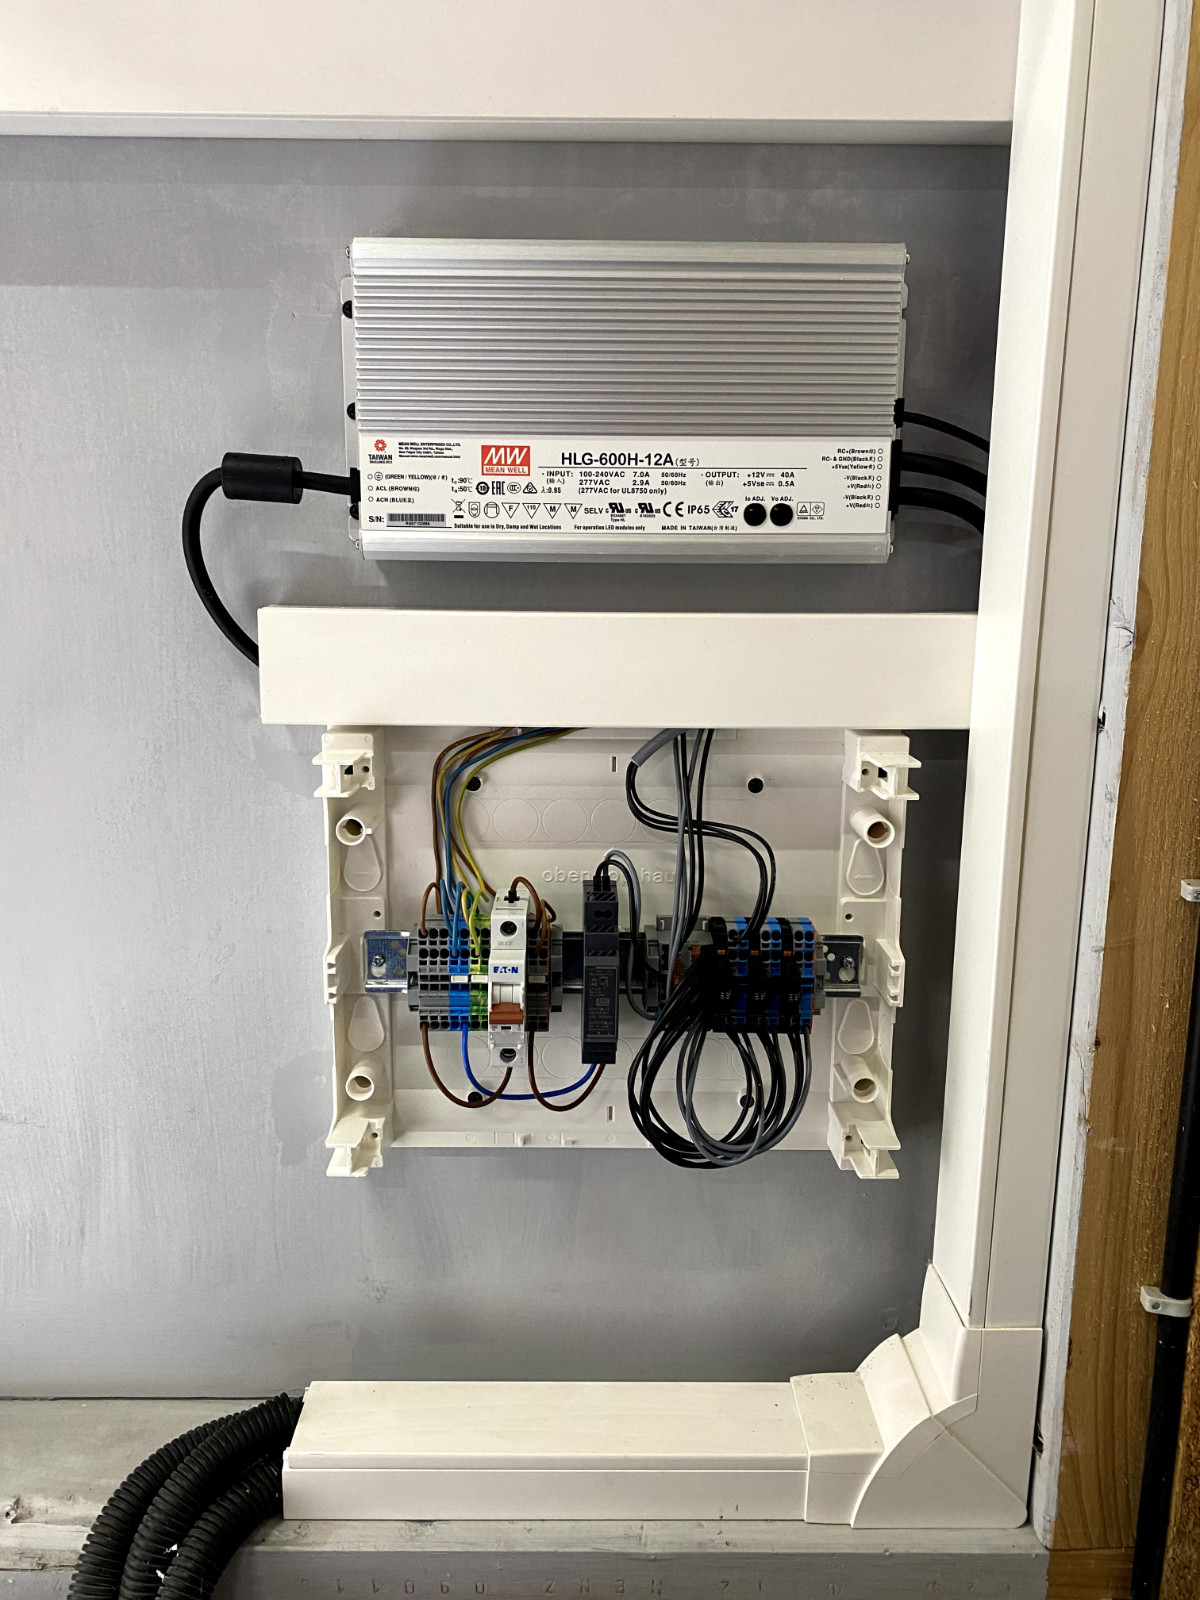
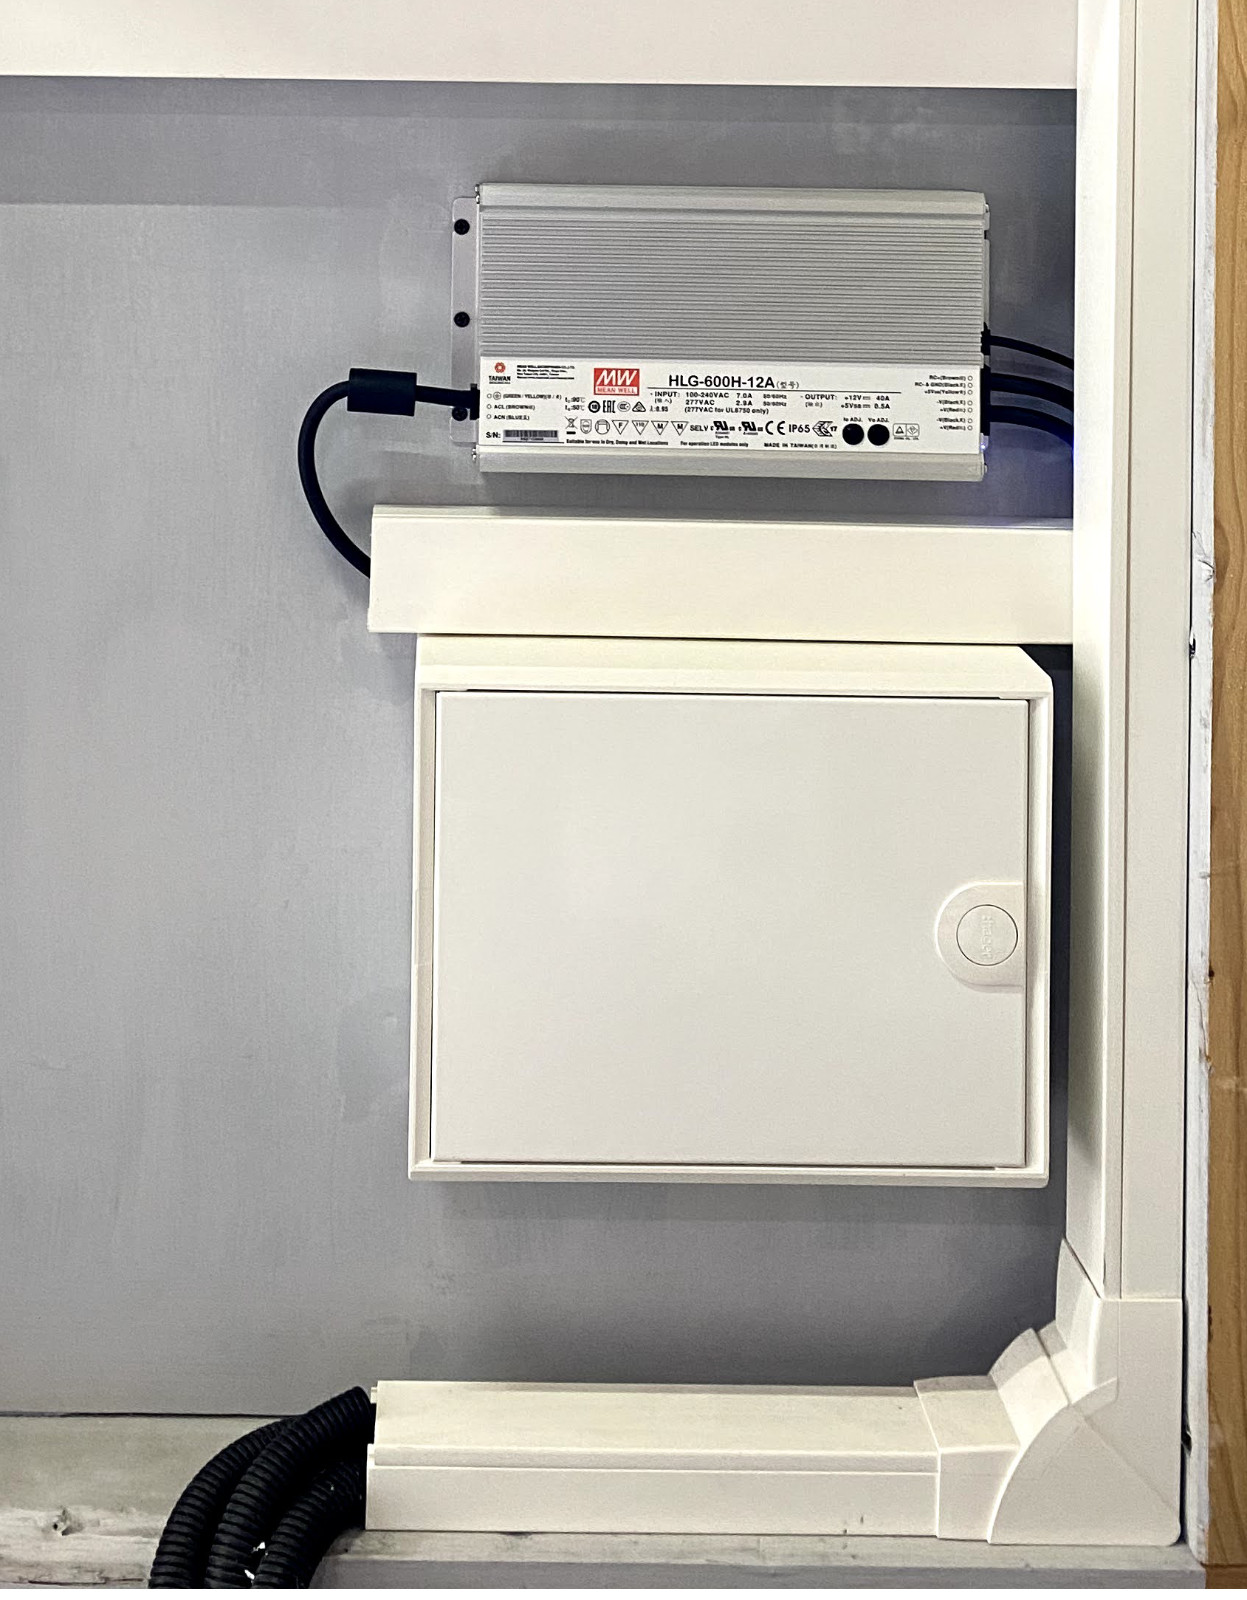
2. Power Supplies
The LED strips use 12V, while my LED controller uses 5V, so I needed two different power supplies. The power supply for the controller does not need much power. For this, I used the MeanWell DIN rail power supply HDR-15-S. However, the capacity for powering the stripes needs to be much higher. I installed 3 x 5m LED Stripes with 60LEDs/m. That makes a total of 900 LEDs. Each LED needs 0,3W. In total, this amounts to a maximum power of 270W. Therefore I decided to use the MeanWell power supply HLG-600H.
3. LED Controller
To control every single LED of the stripe a LED controller is needed. Many other projects use an Arduino, ESP8266 or ESP32 microcontroller for this task. I decided to use a product from cod.m. The LED controller sold there is more expensive than a do-it-yourself, but it is ready to use and works perfectly with my Smart Home system from Loxone.
4. LED mounting
To attach the LED strips to the wooden frame of my carport, I first milled a cut with a router. In this slot I inserted aluminum rails in which the LED strips were glued afterwards. A cover made of opal glass ensures that the individual LEDs of the strip are not clearly visible.
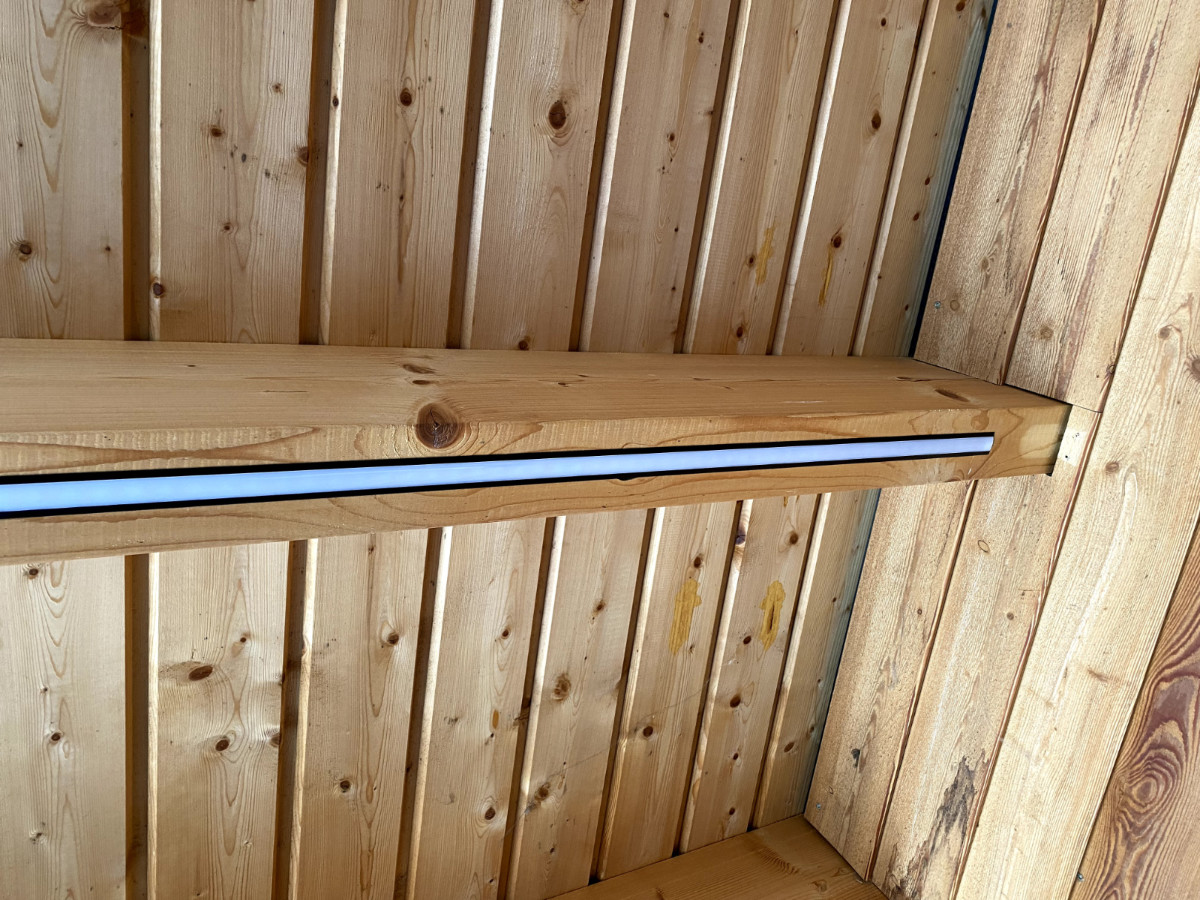
Mounting LED Stripes in aluminium rails
Installation
For the installation of the LED Stripes, I paid special attention to a sufficient and safe power supply. Because at a maximum power of 270W and a voltage of 12V considerably high current passes, good protection of the power supply was very important to me. I have built a small sub-distribution in which I installed several fuses (before and after the power supply).
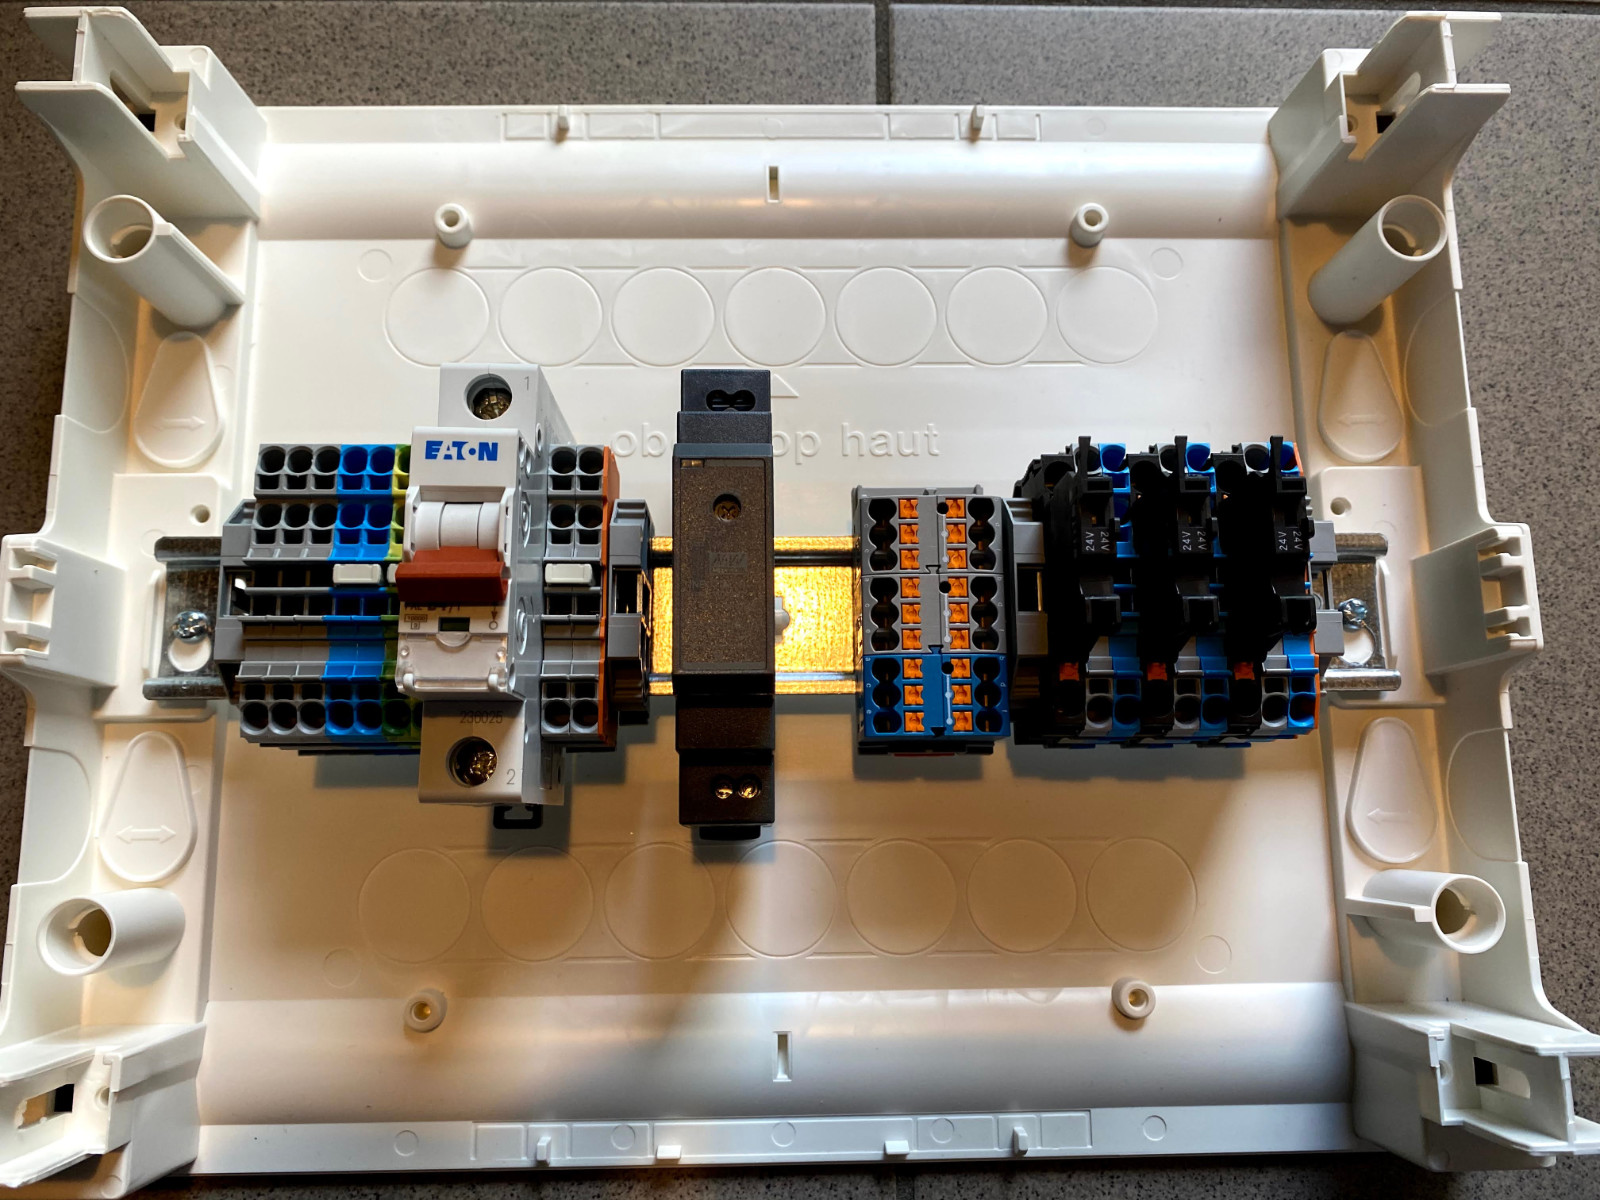
LED Stripe power supply 1
LED Stripe power supply 2
LED Stripe power supply 3
Configuration
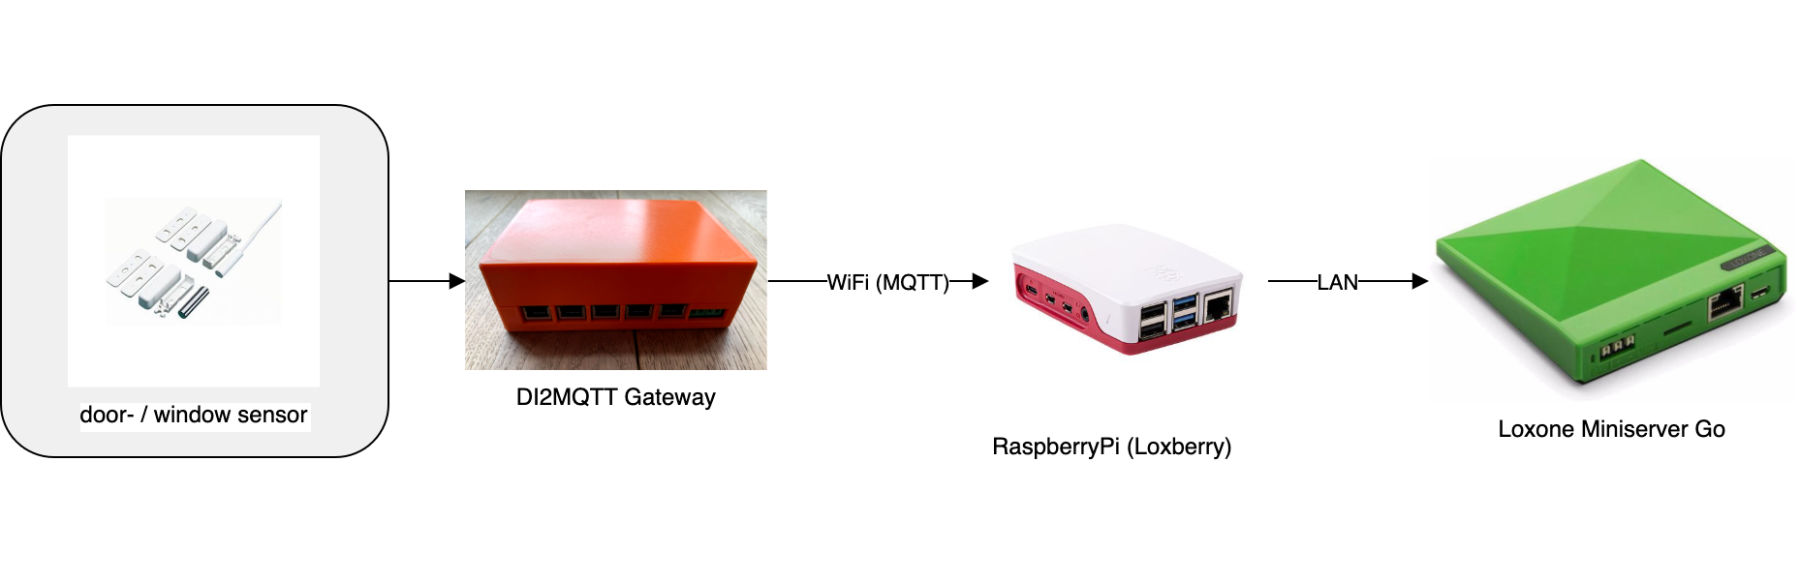
For interaction of the LED controller and Loxone a MQTT gateway (e.g. on a RaspberryPi as described here) is necessary. Afterwards the appropriate MQTT configuration is set in the WLED Controller.
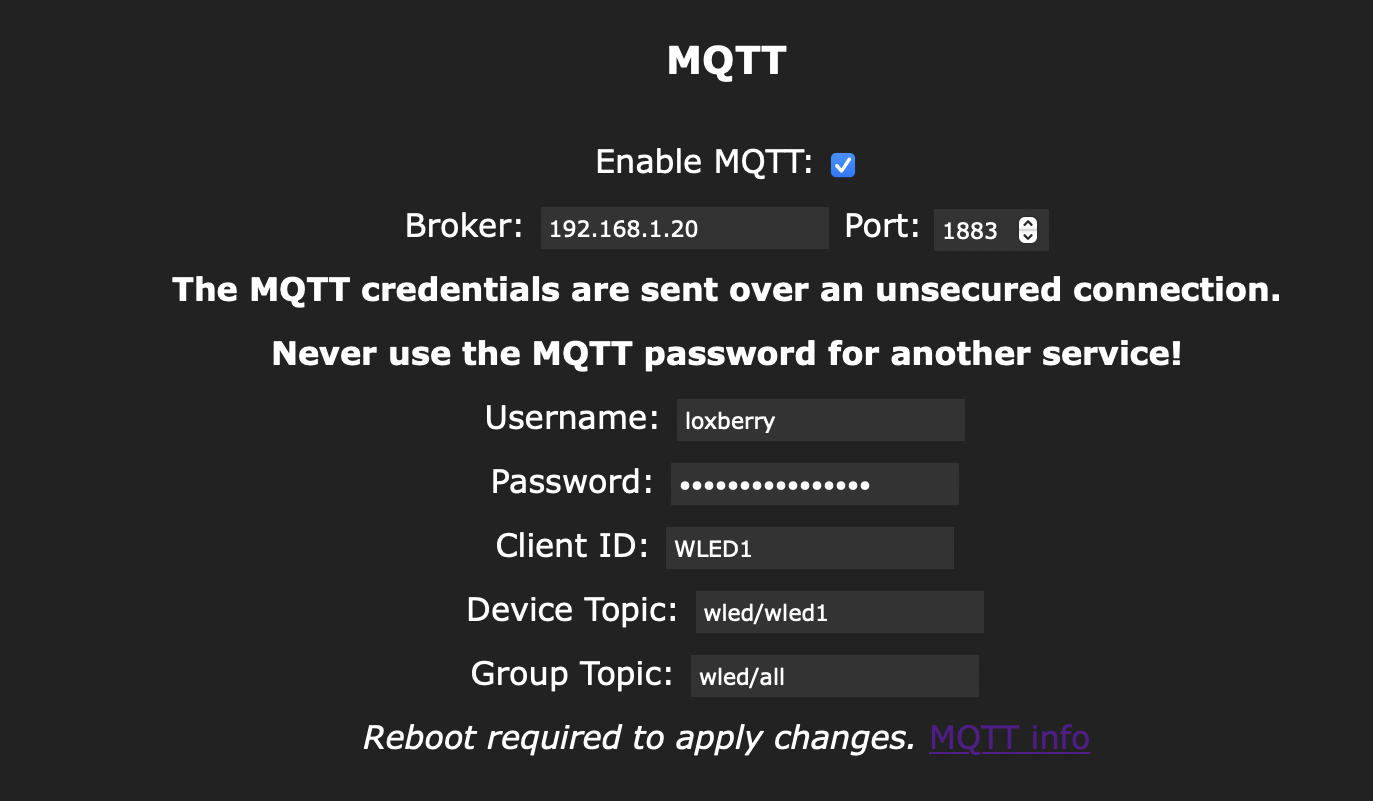
WLED MQTT Configuration
The configuration of the individual light scenes can be transferred to the WLED controller via a complex call within Loxone. Another possibility - which I have used here - is the configuration of light scenes within WLED as favorites. The Loxone configuration select between the numbered favorites only.
Technically, calling the favorites is handled via the MQTT gateway as an MQTT call to WLED. A “virtual output command” is used for this.
- The corresponding command states:
wled/all/api <v> - Set the values as follows:
- off:
T=0 - Favorite 1:
PL=1 - Favorite 2:
PL=2
- off:
Result
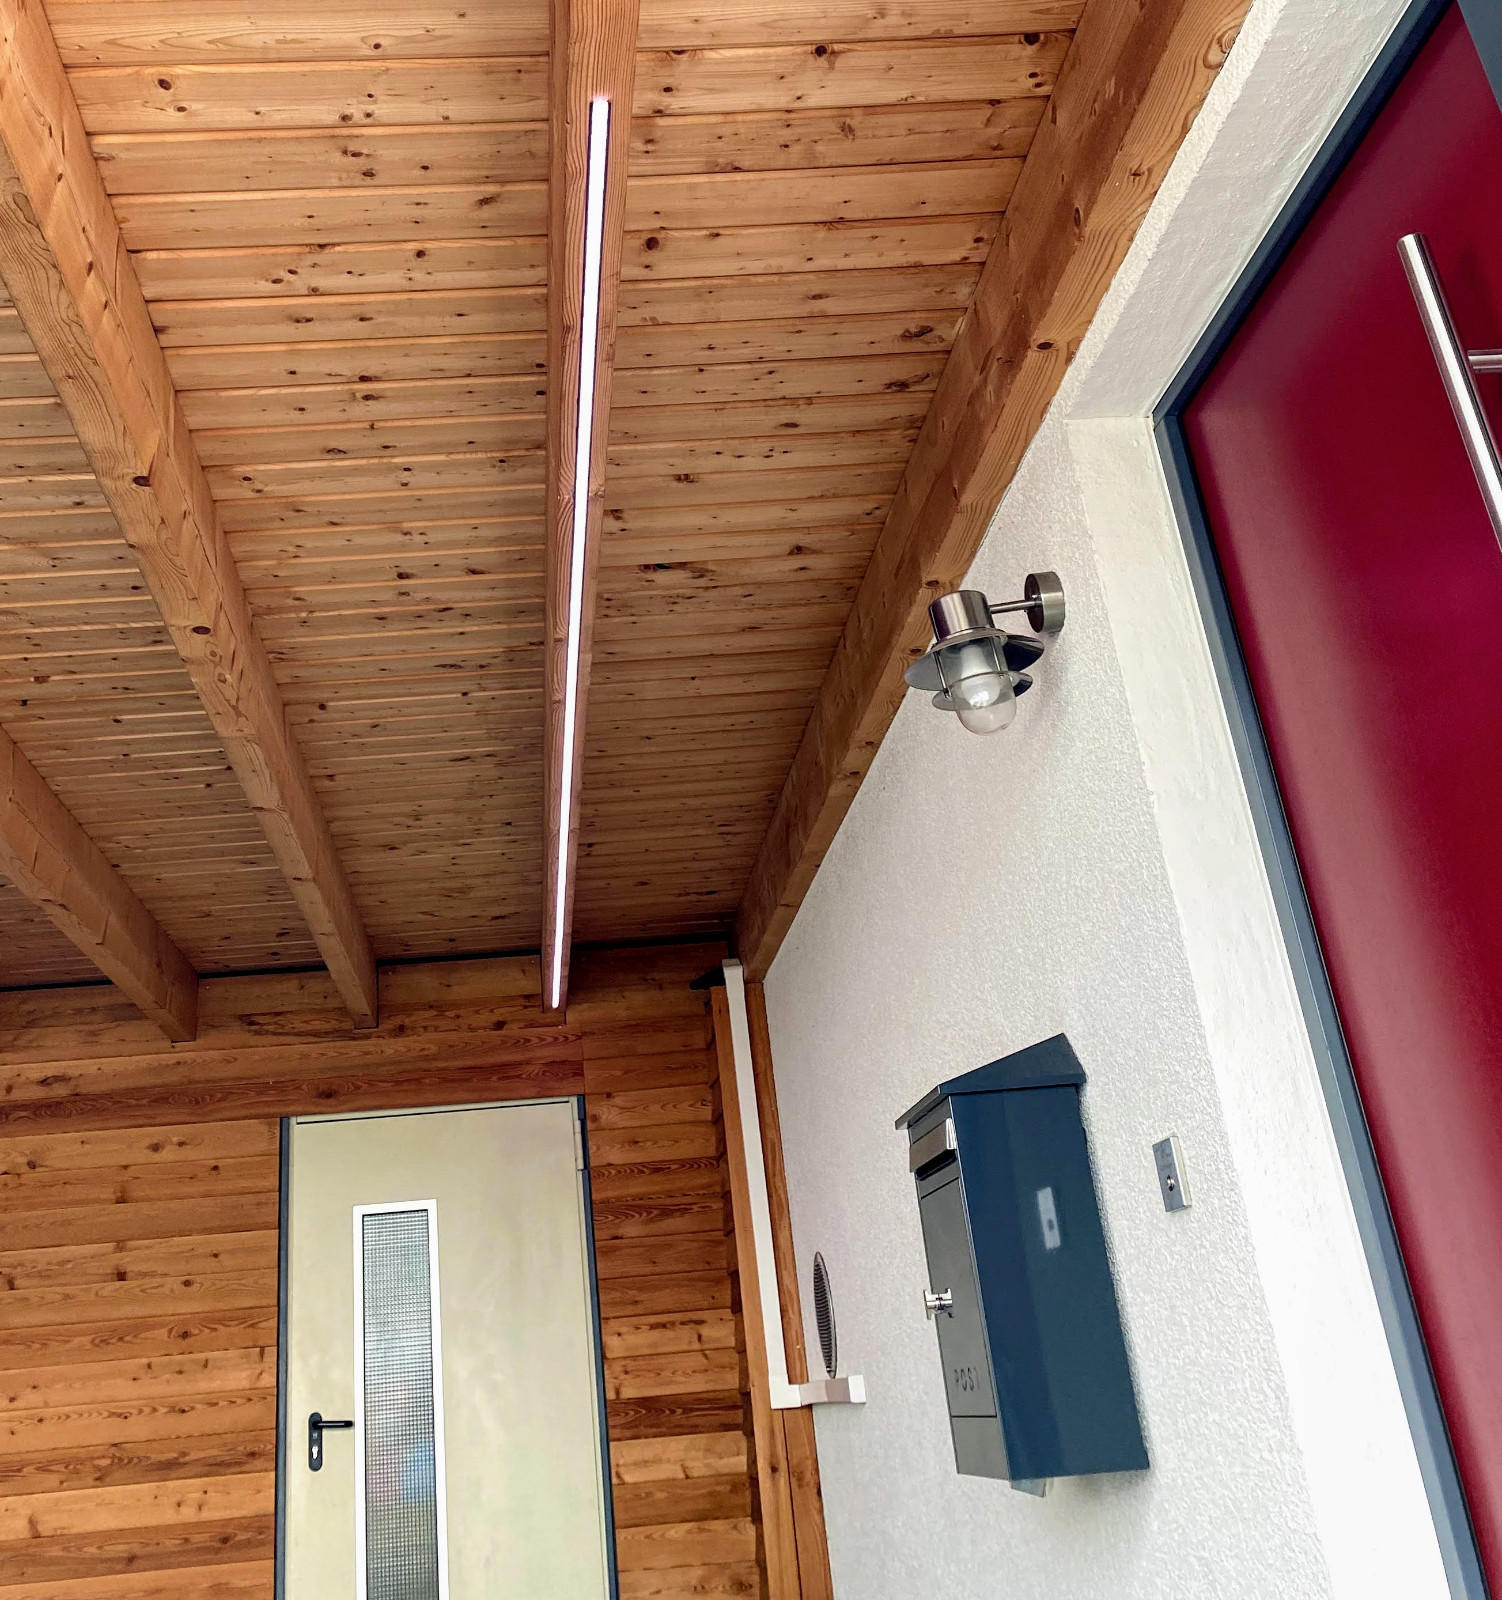
Mounted LED Stripes

lighting scene motion detected
I significantly underestimated the planning and installation effort of the carport LED lighting at the beginning. But I am super satisfied with the result and am happy about the beautiful lighting every evening. The following video shows the currently implemented light scenes in the interaction of Loxone and WLED:
Forecast
The project WLED lighting is not yet finished for me with this post. On the one hand, I would like to equip our future outdoor patio lighting with smart LED stripes. On the other hand, I will continue to experiment with the various effects of WLED. Whether as funny lighting for parties or to display the state of charge when charging an electric car at the wallbox.