DI2MQTT Project - Smart Home Digital Input Device - Part2: Software
20 digital inputs, read in via ESP32 microcontroller and sent out via MQTT protocol.
Monitoring of all windows and doors of our Smart House. This is the main purpose of my self-made project DI2MQTT. While part 1 was about hardware for the project, this blog post is dedicated to the software.
Features
In addition to determining the status of all windows and doors in our smart house, my DI2MQTT project was primarily intended to ensure that this status can be read into Loxone without any delay. This allows not only a simple visualization but also to perform analysis such as the notification of open windows when leaving the house.
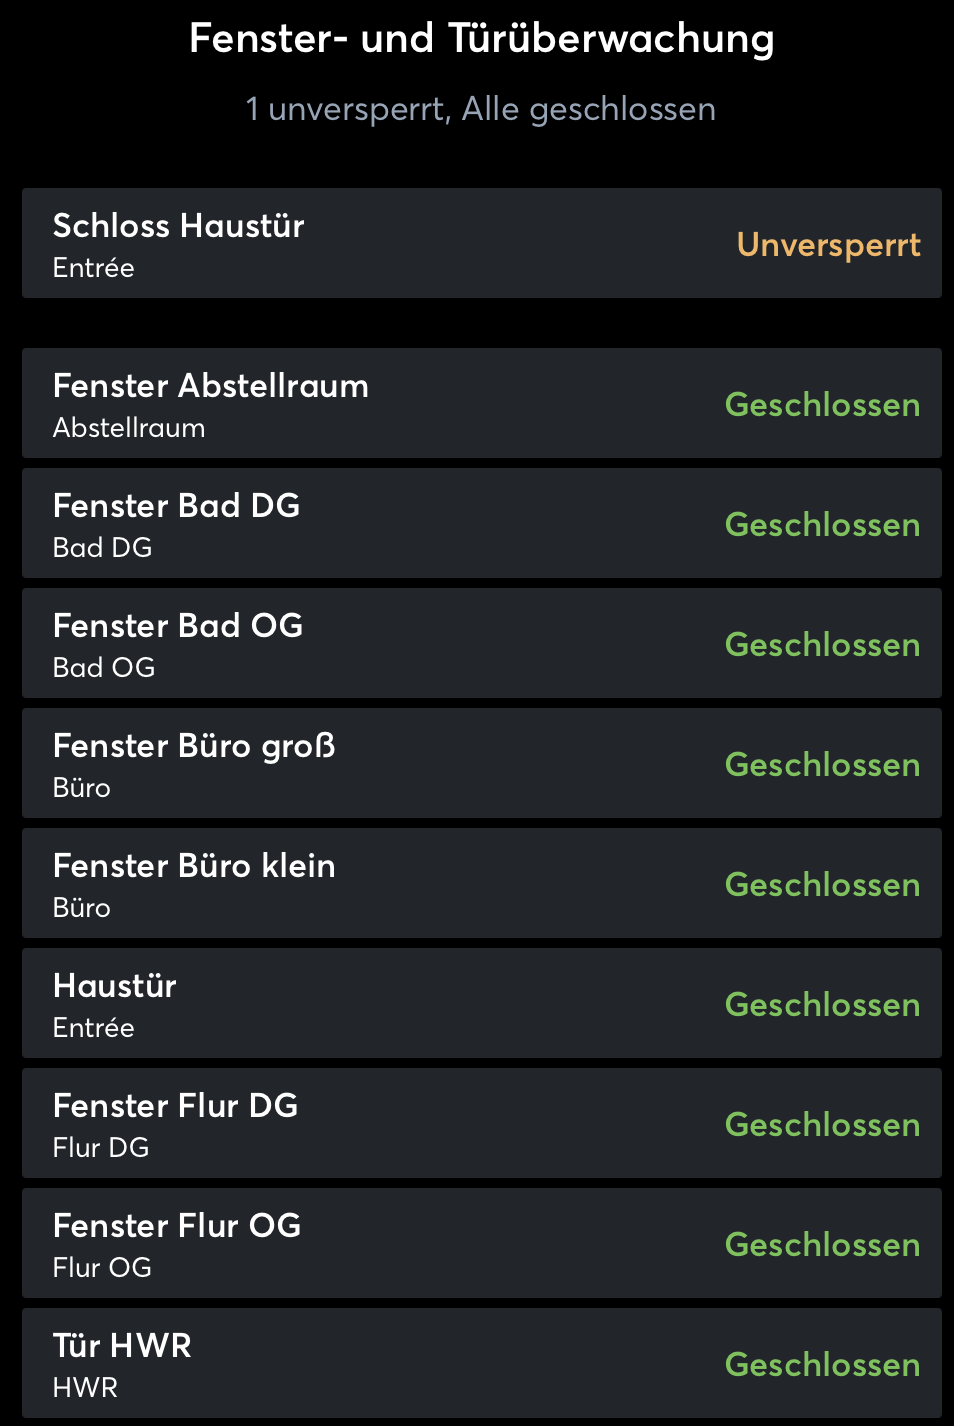
Loxone window & door monitoring
To be location-independent, DI2MQTT sends its status messages via WiFi. In addition, the software part of DI2MQTT also offers the possibility of a firmware update over the air and sends additional debug information such as heartbeats and version information alongside its status messages.
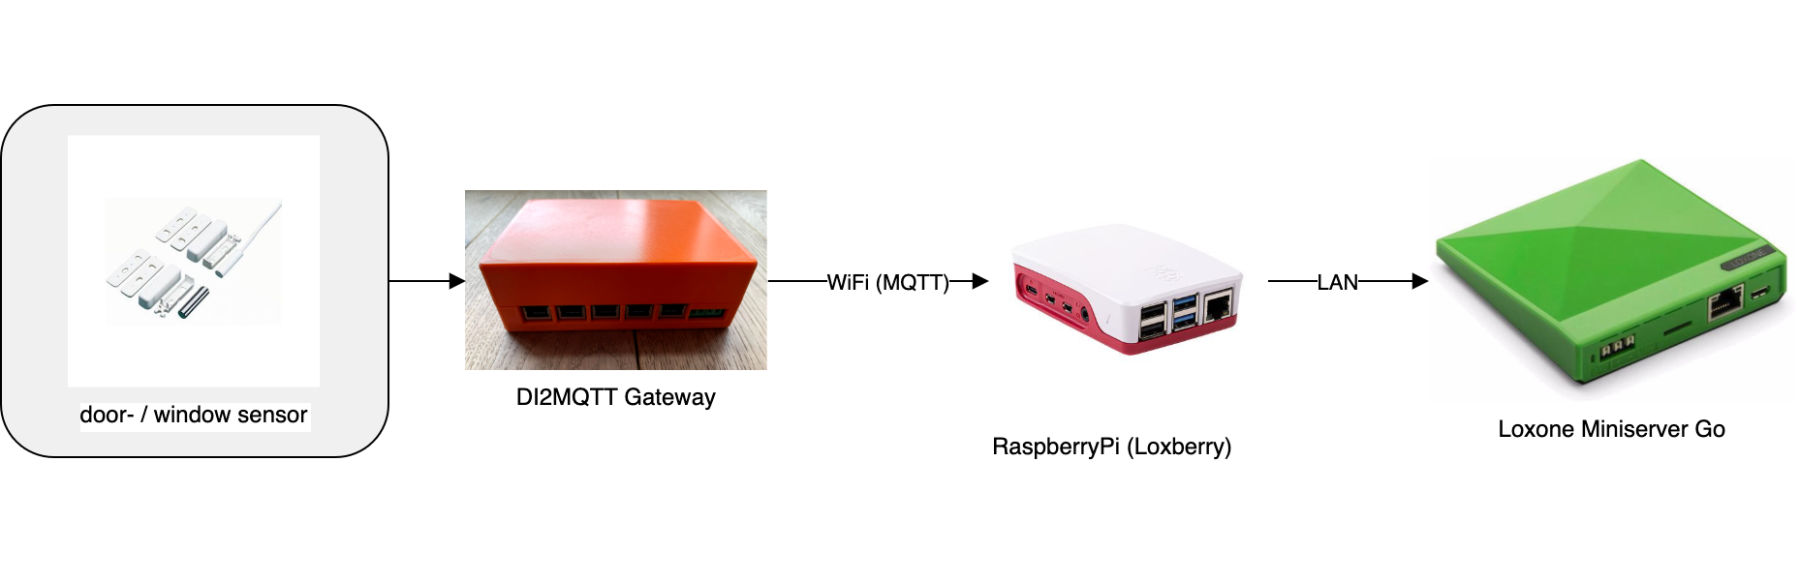
Architecture
The software architecture of DI2MQTT in combination with my other Smart House components consists of various steps:
- Reading the door and window states via digital inputs of the ESP32.
- Sending status and debug messages via MQTT
- Receiving MQTT messages in an MQTT broker (Loxberry)
- Import of the signals in Loxone
- Displaying and evaluating for further logic in Loxone

DI2MQTT architecture
development environment
To flash the DI2MATT software to the ESP32 microcontroller, some preparatory steps are necessary. My following instructions assume a setup of Visual Studio Code (VSC) in combination with PlatformIO. The following links will help you to install and set up both components:
Code
You can find the code for the ESP32 microprocessor on Github. It is a modified version of the AutoConnect library. AutoConnect provides a web interface for easy connection of the ESP32 to your local WiFi. The configuration parameters (WiFi and MQTT credentials) are stored in a non-volatile part of the ESP32 and thus must not be stored inside the sourcecode.
AutoConnect Webinterface - image reference: https://hieromon.github.io/AutoConnect
Initial flashing
The initial flashing of the ESP32 microcontroller is slightly tricky. One reason is that I forgot to include a flash button during the design of the PCB. Therefore the ESP32 has to be put into flash mode by a shorting of the pins GND and GPIO0 at startup. Secondly because the flash process has to be done twice: Once for the nonvolatile part of the firmware (the SPIFFS filesystem). This contains the access data of your WiFi and MQTT. The second flash process writes the actual firmware to the ESP32. More about SPIFFS can be found here.
For flashing you need a USB TTL converter, which is connected to your computer via USB and to the DI2MQTT board via TTL.
The steps to flash the firmware for the first time are as follows:
-
download project from Github and open in Visual Studio Code
-
build SPIFFS filesystem in tab
PlatformIOwith click onESP32 / Platform / Build Filesystem Image. -
flash SPIFFS filesystem:
- Connect USB TTL converter (do not connect power yet)
- connect GND + GPIO0 to set ESP32 in flash mode
- Connect power
- Start flashing with click on ‘ESP32 / Platform / Upload Filesystem image
-
build firmware with click on
buildin lower taskbar -
flash firmware:
- Connect USB TTL converter (do not connect power yet)
- Connect GND + GPIO0 to set ESP32 in flash mode
- Connect power
- Start flashing by clicking on
uploadin lower taskbar
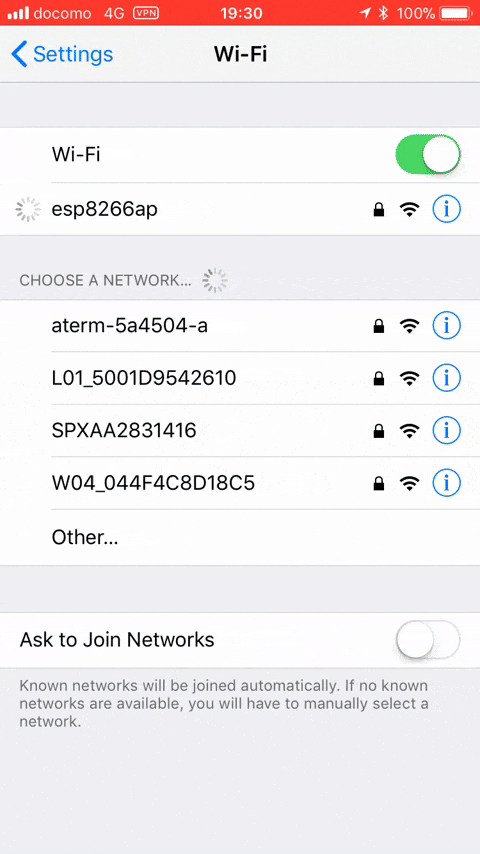
After restarting the ESP32, it will open a WiFi access point. When you connect to it, you will be prompted to enter your WiFi access data. After successful input, the ESP32 will connect to your home network and you can access its user interface by entering the IP address assigned to your router in your browser.
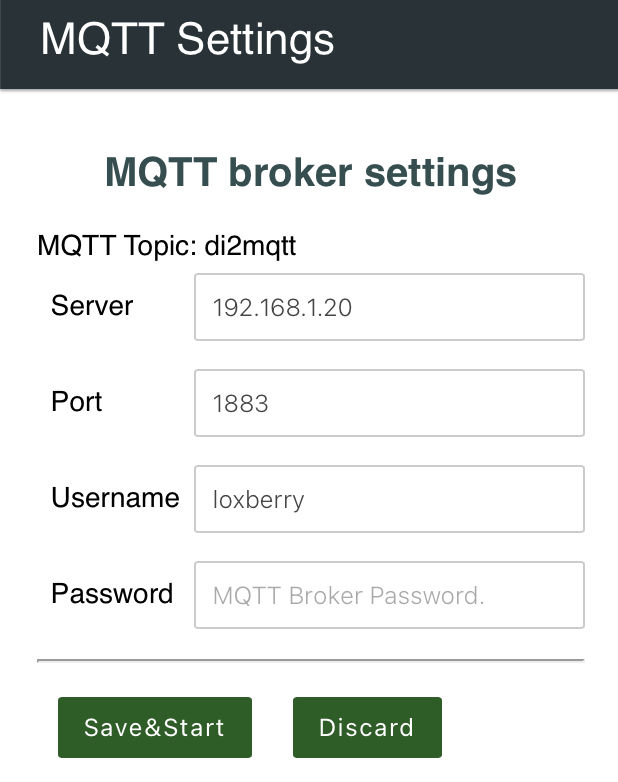
MQTT settings
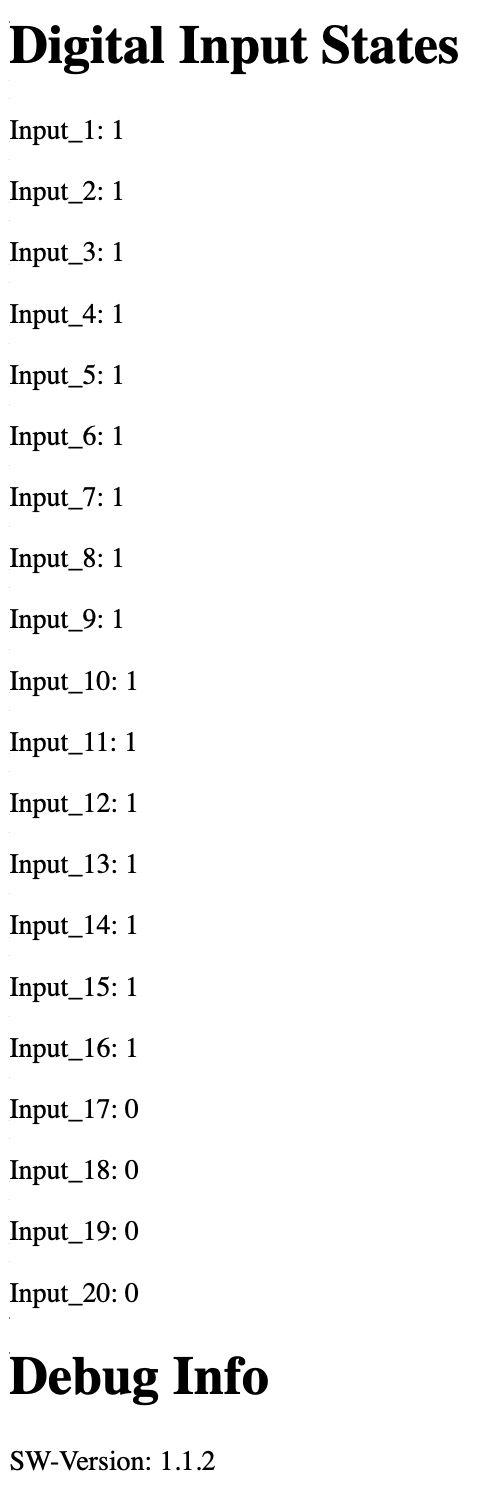
The last step is to enter your MQTT credentials to which the DI2MQTT should send the status of the doors and windows. This completes the setup and you can already see the detected states of the digital inputs on the start page.
DI2MQTT Webview
Over-The-Air updates
After the initial flash process, further firmware updates can be uploaded very comfortably over-the-air. The firmware images built in Platformio for over the air upload can be found in the following subfolder of your project:
/.pio/build/featheresp32/firmware.bin

updating firmware
If the over-the-air update was successful, the message update successful - rebooting appears.
With each update, you should increase the SW version variable (to be found in main.cpp under #define SW_VERSION). This is listed as debug info on the main page and also confirms the successful over-the-air update.
Summary & Forecast
In this two-part blogpost (hardware & software) I shared my first fully self-developed smart home project: The DI2MQTT, a smart analyzer of our door and window states that works with numerous smart home systems through the universal MQTT interface.
By building it myself, I not only learned a lot of new things about board layout, microcontrollers and programming, but also saved a lot of money compared to other commercial projects. Since the DI2MQTT is working stable at home for more than one year now, I can recommend you - if you have a similar application - to rebuild it (ideally in a slightly improved version than mine).
Since I am so enthusiastic about the ESP32 microcontroller, I plan to do more projects with it in the future. I would like to make the control of our ventilation and heating a bit smarter and I have the implementation of an ePaper family calendar with ESP32 control in mind.